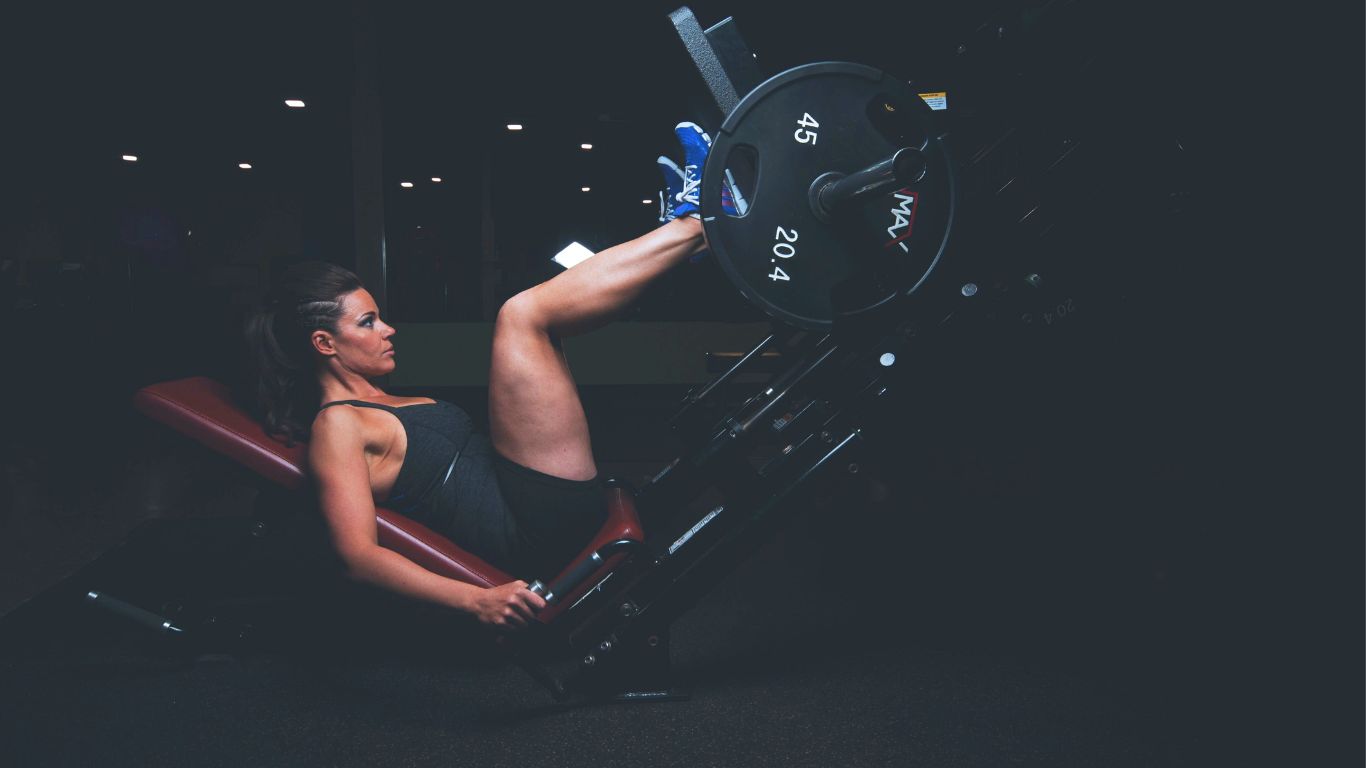
7 Best Compound Back Exercises for Strong and Sexy Back

Compound back workouts are the key for anybody trying to build strength and add muscle. These exercises target multiple muscle groups simultaneously, making them highly efficient. Some popular compound back exercises include deadlifts, pull-ups, and bent-over rows. Incorporating these exercises into your workout routine will help you achieve a stronger and more sculpted back.

Not only do compound back exercises promote a stronger and more sculpted back, but they also improve posture and reduce the risk of back injuries. Deadlifts, for example, not only target the back but also engage the core, glutes, and legs. Pull-ups, on the other hand, work the back, arms, and shoulders, providing complete upper body compound exercises. Bent-over rows, meanwhile, effectively target the upper and lower back muscles, helping to build strength and stability.

By including these compound exercises in your routine, you can maximize your results and develop a well-rounded physique.

BEST COMPOUND BACK WORKOUT

Listed below are the most result-driven compound back exercises that are sure to add strength and muscle to your body.

1. Barbell Deadlifts

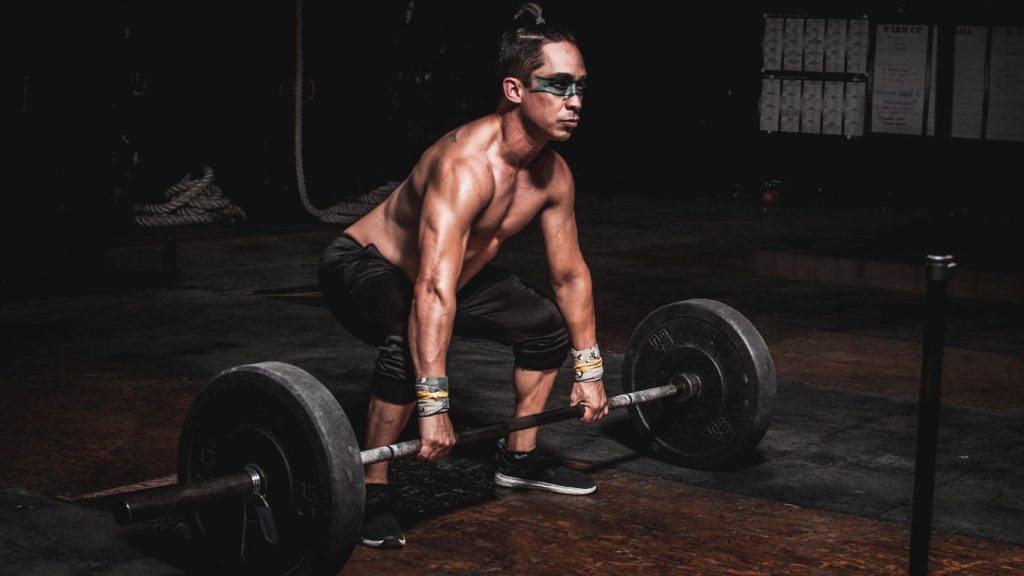
This compound exercise targets multiple muscle groups in your back, including the erector spine, lats, and traps. By lifting heavy weights from the ground, deadlifts not only build strength but also improve your overall posture and stability. 
Credit: Leon Ardho / pexels

How to do a barbell deadlift step by step?

[Read More: 7 Best Compound Back Exercises for Strong and Sexy Back]

Equipment and Setup:

  1. Barbell: Place a barbell on the floor. You can use a standard Olympic barbell, which typically weighs 45 pounds (20.4 kg), but there are also variations with different weights. Ensure the barbell is centered and properly loaded with weight plates.
  2. Foot Placement: Stand with your feet hip-width apart, with your mid-foot under the barbell. Your toes should be pointing slightly outward.
  3. Grip: Bend at your hips and knees to reach down and grip the barbell. You can use either an overhand grip (both palms facing you) or a mixed grip (one palm facing you, one palm facing away). Choose the grip that feels most comfortable and secure for you.

Execution:

4. Set Your Back: Before lifting the barbell, engage your core and set your back in a neutral position. Your spine should be in a natural, slightly arched shape. Keep your chest up and your shoulder blades retracted.

  1. Lift the Bar: While keeping the barbell close to your shins, push through your heels and stand up. Extend your hips and knees simultaneously. Keep the bar as close to your body as possible throughout the lift.
  2. Full Extension: At the top of the lift, stand tall with your hips fully extended. Your back should be straight, and your shoulders should be back.
  3. Lower the Bar: To lower the barbell, push your hips back first and then bend your knees. Keep the barbell close to your body as you descend.
  4. Touch the Floor: Gently touch the barbell to the floor, maintaining control. Do not drop it, as this can be unsafe and may damage the equipment.

Common Tips:

  • Maintain a smooth and controlled movement throughout the lift.
  • Breathe in before you lift, hold your breath during the lift, and exhale at the top of the movement.
  • Keep the bar close to your body to prevent it from swinging away from you.
  • Avoid rounding your lower back, as this can lead to injury. Focus on maintaining a neutral spine.

2. Pull-Ups

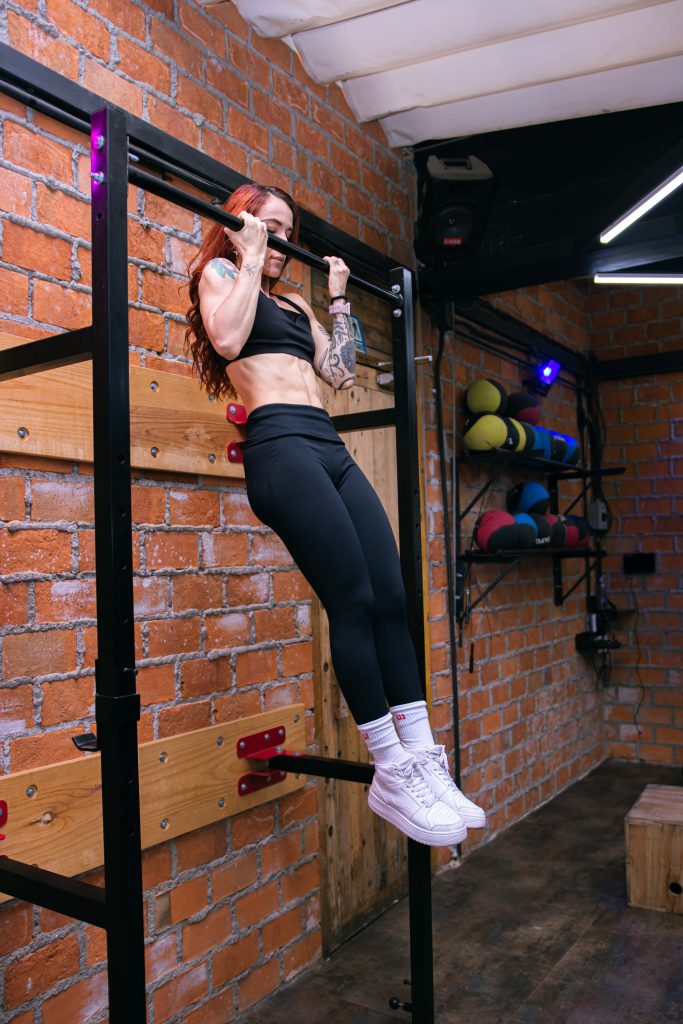
Pull-ups are a challenging bodyweight exercise that targets your back, specifically your lats and biceps. By hanging from a bar and pulling your body up until your chin is above the bar, you strengthen your upper body and improve your pulling strength. To make pull-ups easier, you can use an assisted pull-up machine or resistance bands, gradually increasing your strength until you can perform them unassisted.
Credit: Ali Alcántara / Pexels

How To Perform Pull-Ups? 

Performing pull-ups is an effective bodyweight exercise for developing your upper body strength, particularly your back, lats, and biceps. Here’s a step-by-step guide on how to perform pull-ups correctly:

Equipment and Setup:

  1. Pull-Up Bar: You’ll need access to a pull-up bar, which can be found at most gyms or installed at home. Make sure that the bar is secure and can sustain your body weight.

Execution:

2. Grip: Stand underneath the pull-up bar with your feet shoulder-width apart. Reach up and grasp the bar with your palms facing away from your body (an overhand grip) and your hands slightly wider than shoulder-width apart. You can also use other grip variations, like chin-ups (palms facing you) or a neutral grip (palms facing each other), depending on your preference.

  1. Hang: Hang from the bar with your arms fully extended. Your body should be straight and your core engaged. This is the starting position.
  2. Pull-Up: Initiate the pull-up by pushing your shoulder blades together and lifting your chest towards the bar. Focus on utilizing your back and arm muscles to elevate your body. Keep your elbows close to your body as you pull.
  3. Chin Above the Bar: Continue pulling until your chin is above the bar or as high as you can comfortably go.
  4. Lower Down: Lower your body back down with control until your arms are fully extended again. This completes one repetition.
  5. Repeat: Perform the desired number of repetitions. If you’re a beginner, you might start with just a few reps and gradually increase over time.

Common Tips:

  • Keep your body straight throughout the movement, and avoid swinging or using momentum.
  • Focus on controlled and deliberate movements rather than jerking or using excessive speed.
  • Engage your core muscles to maintain stability during the exercise.
  • Breathe in on the way down and exhale as you pull yourself up.
  • If you can’t do a full pull-up, you can start with assisted pull-ups or use resistance bands to make the exercise easier. Alternatively, you can try negative pull-ups, where you only focus on the lowering portion of the movement to build strength.

3. Bent-over Rows

Another effective compound exercise, bent-over rows primarily work your lats, rhomboids, and rear delts. By pulling a weight towards your body while maintaining a bent-over position, you engage various muscles in your back, promoting muscle growth and enhancing your upper body strength.
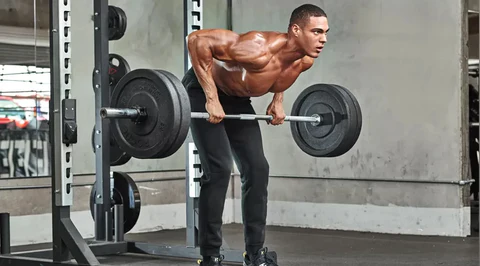
Image Source

How to Do Bent Over Rows?

Bent-over rows are an excellent compound exercise for targeting the muscles of your upper and middle back, particularly the rhomboids, lats, and traps. Here’s a step-by-step guide on how to perform bent-over rows with proper form:

Equipment and Setup:

  1. Barbell or Dumbbells: You can perform bent-over rows with either a barbell or dumbbell. Choose the equipment that suits your preferences and availability.
  2. Barbell Setup (if using): If you’re using a barbell, load it with the desired weight plates and place it on a squat rack or on the floor. Ensure it’s positioned at about hip or shin level when you stand next to it.
  3. Foot Placement: Stand with your feet hip-width apart, with your toes pointing forward or slightly outward.

Execution:

4. Grip: If using a barbell, bend at your hips and knees to reach down and grasp the barbell with an overhand grip (palms facing you). Your hands should be positioned slightly wider than shoulder-width apart. If using dumbbells, hold one in each hand with an overhand grip.

  1. Bend at the Hips: While maintaining a straight back, bend at your hips to lower your torso until it’s nearly parallel to the floor. Keep your knees slightly bent throughout the movement.
  2. Back Position: Ensure that your back is flat, not rounded or arched. Your core should be engaged for stability, and your chest should be up.
  3. Rowing Movement: Pull the barbell (or dumbbells) towards your lower ribcage by retracting your shoulder blades and flexing your elbows. Keep the barbell or dumbbells close to your body as you pull.
  4. Peak Contraction: Squeeze your shoulder blades together at the top of the movement. The barbell or dumbbells should be close to your body, and your elbows should point upward.
  5. Lowering Phase: Lower the barbell (or dumbbells) back to the starting position in a controlled manner. Allow your arms to fully extend.
  6. Complete the Repetition: Perform the desired number of repetitions, maintaining proper form.

Common Tips:

  • Keep your back straight and avoid rounding your spine during the exercise.
  • Use a weight that allows you to perform the exercise in proper form. As you gain strength, you can gradually increase the resistance.
  • Breathe in as you lower the weight and exhale as you lift it.
  • Avoid using momentum or jerking the weight; focus on controlled movements.
  • Remember that form is more important than the amount of weight you lift. Start with a manageable weight to ensure you perform the exercise correctly.

4. Lat Pulldowns

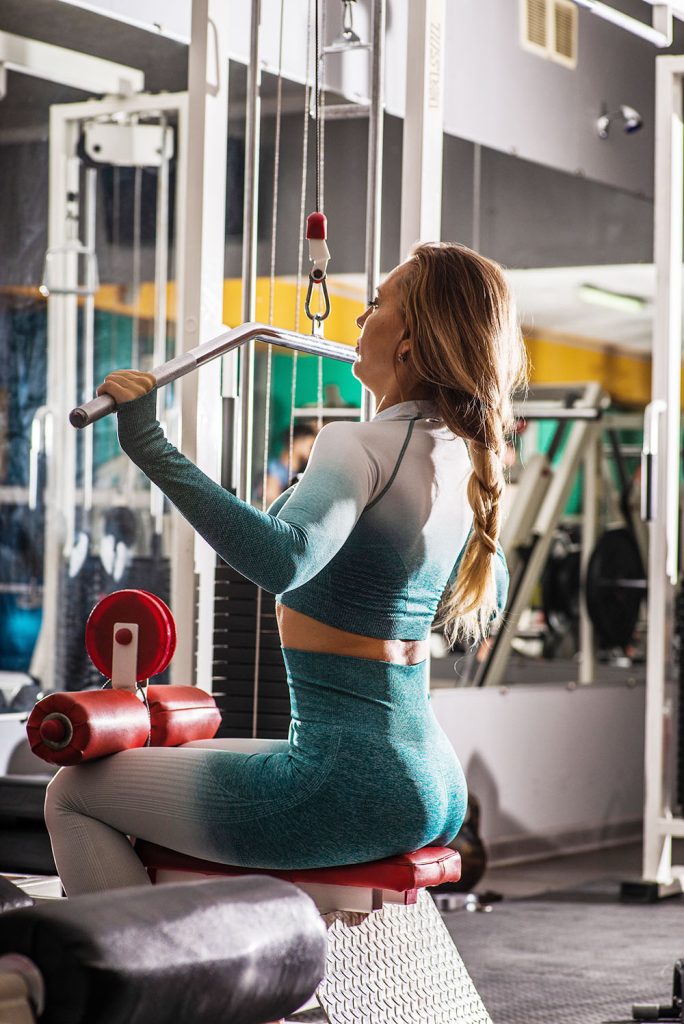
Lat pulldowns are a machine exercise that effectively isolates the latissimus dorsi muscles, helping to create that “V” shape.
Credit: Ruslan Khmelevsky / pexels

The latissimus dorsi muscles, commonly known as the lats, are one of the largest muscle groups in the upper body. They extend from the upper arm to the lower back and play a crucial role in various pulling movements. Lat pulldowns specifically target these muscles, providing a challenging and effective workout for developing a strong and well-defined back.

How To Perform Lat Pulldown?

Lat pulldowns are an effective exercise for targeting the latissimus dorsi muscles, or “lats,” in your back. Here’s a step-by-step guide on how to perform lat pulldowns with proper form:

Equipment and Setup:

  1. Lat Pulldown Machine: Find a lat pulldown machine at your gym. The machine consists of a high pulley with a bar attachment, a seat, and knee pads. Adjust the knee pad height to fit your body comfortably.
  2. Weight Selection: Choose the appropriate weight by selecting a weight plate and attaching it to the weight stack. Start with a manageable weight to ensure proper form.

Execution:

3. Seat Position: Sit on the lat pulldown machine’s seat with your back straight, chest up, and your feet flat on the floor. Your thighs should be secured under the knee pads. Adjust the thigh pad so that it fits snugly over your thighs.

  1. Grip: Reach up and grab the bar attachment with a wide overhand grip (palms facing away from you). Your hands should be wider than shoulder-width apart.
  2. Posture: Sit with your back straight and your shoulders relaxed. Keep your core engaged for stability.
  3. Initiate the Pull: Start by pulling the bar down toward your chest. As you pull, focus on bringing your elbows down and back, squeezing your shoulder blades together.
  4. Contraction: Continue pulling until the bar is just below your chin and you feel a strong contraction in your lats.
  5. Hold and Squeeze: Hold the contracted position for a moment, emphasizing the engagement of your lats.
  6. Return the Bar: Slowly and with control, let the bar rise back up to the starting position, allowing your arms to fully extend. Avoid any jerky or abrupt movements.
  7. Repeat: Perform the desired number of repetitions with proper form.

5. Seated Cable Rows

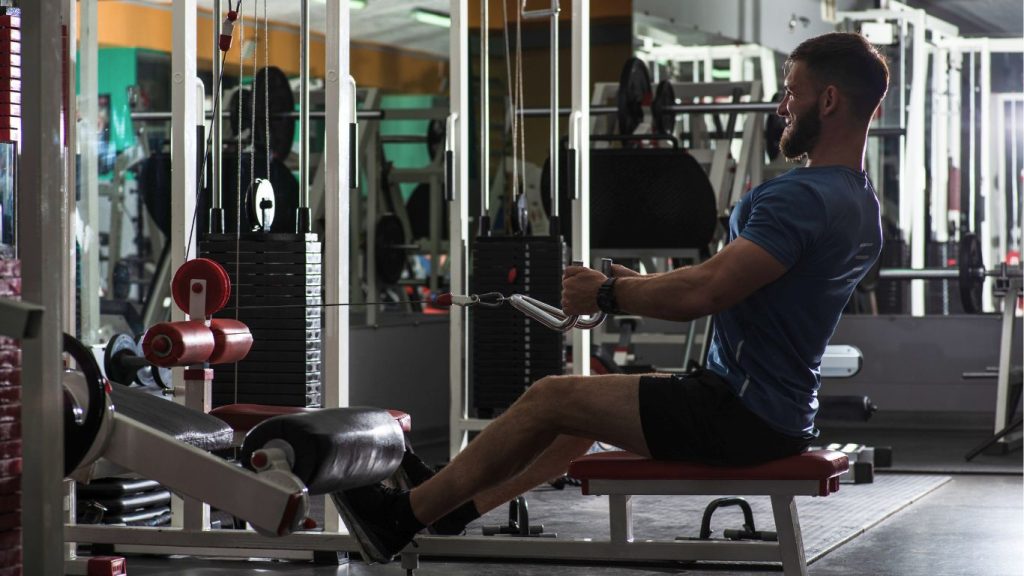
Seated cable rows provide a good workout for the lats and rhomboids. They are great for building thickness in the middle back.
Credit: Ruslan Khmelevsky / pexels

How To Perform Seated Cable Rows?

Seated cable rows are a compound exercise that targets the muscles of the upper and middle back, including the rhomboids, traps, and lats. Here’s a step-by-step guide on how to perform seated cable rows with proper form:

Equipment and Setup:

  1. Cable Row Machine: Locate a seated cable row machine at your gym. The machine typically consists of a cable, a handle attachment, a seat, and a foot platform.
  2. Weight Selection: Choose the appropriate weight by attaching a weight plate to the machine’s weight stack. Start with a manageable weight to ensure proper form.

Execution:

3. Seat Position: Sit on the machine’s seat with your back straight, chest up, and your feet flat on the foot platform. Ensure that your knees are slightly bent and that your thighs are secured under the knee pads.

  1. Grip: Reach forward and grasp the handle attachment with an overhand grip (palms facing down). Your hands should be shoulder-width apart or slightly wider.
  2. Posture: Sit with your back straight and your shoulders relaxed. Keep your core engaged for stability.
  3. Initial Position: Fully extend your arms and lean forward slightly while keeping your back straight. This is your starting position.
  4. Initiate the Pull: Pull the handle attachment toward your lower abdomen by flexing your elbows and squeezing your shoulder blades together. Focus on the contraction of your back muscles.
  5. Hold and Squeeze: Hold the contracted position for a moment, emphasizing the engagement of your back muscles.
  6. Return the Handle: Extend your arms and slowly return the handle to the starting position, keeping the movement controlled and avoiding any jerky motions.
  7. Repeat: Perform the desired number of repetitions with proper form.

6. One-Arm Dumbbell Rows

One-arm dumbbell rows allow you to isolate each side of your back individually, helping to correct imbalances and build a symmetrical back. This exercise is also great for targeting the muscles in your upper back, including the rhomboids and trapezius.
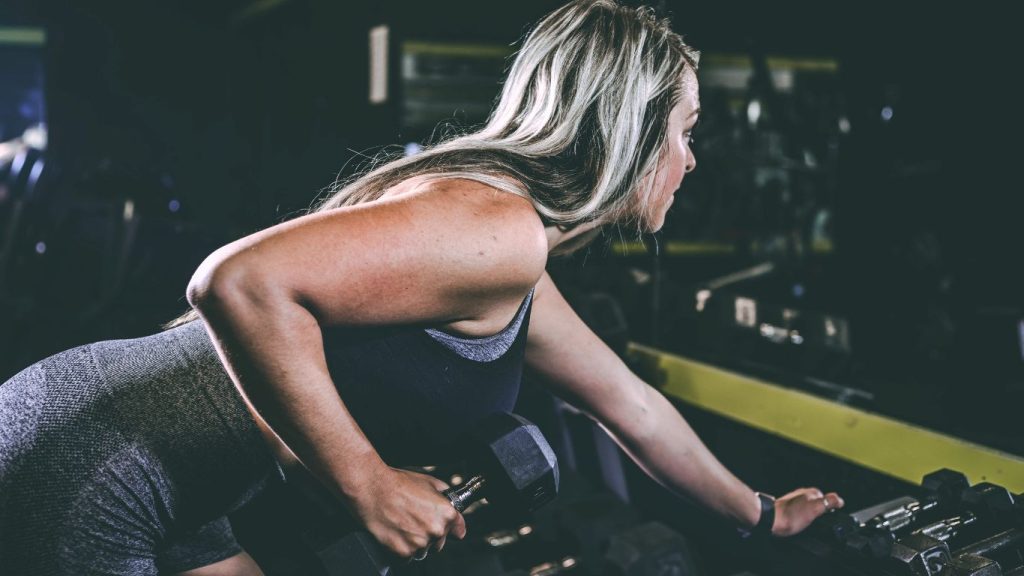
By performing one-arm dumbbell rows regularly, you can improve your posture and strengthen the muscles that support your spine. Additionally, this exercise engages your core as you stabilize your body, making it an effective compound movement for overall strength and stability.

How To Do a Single-Arm Dumbbell Row?

Single-arm dumbbell rows are an effective exercise for targeting the muscles of the upper back, including the lats, rhomboids, and traps. Here’s a step-by-step guide on how to perform single-arm dumbbell rows with proper form:

Equipment and Setup:

  1. Dumbbell: Choose an appropriate dumbbell weight for this exercise, typically starting with a lighter weight to ensure proper form.
  2. Bench: You’ll need a bench to support your non-working arm and knee. Place the bench next to a flat bench or a rack with dumbbells.

Execution:

3. Bench Position: Place the dumbbell and a bench next to each other. Kneel on the bench, positioning your knee and shin on the bench, while your other foot is on the floor. The knee and shin of your working arm (the arm that will perform the row) should be on the bench, and your non-working hand should hold the bench for support.

  1. Grip: Reach down and pick up the dumbbell with your working hand. Your palm should be facing your body, and your back should be straight.
  2. Posture: With your non-working arm and your hand on the bench for support, keep your back straight and your chest up. Your working arm with the dumbbell should be fully extended, hanging straight down.
  3. Rowing Movement: Pull the dumbbell towards your hip by flexing your elbow and squeezing your shoulder blade. Keep your upper arm close to your side as you lift the weight.
  4. Hold and Squeeze: At the top of the movement, hold the contracted position for a moment, emphasizing the engagement of your back muscles.
  5. Lower the Dumbbell: Lower the dumbbell back down to the starting position in a controlled manner, allowing your arm to fully extend.
  6. Complete the repetition: Perform the desired number of repetitions with proper form.
  7. Switch Sides: Once you’ve completed the desired number of reps on one side, switch to the other side and repeat the exercise.

7. Face Pulls

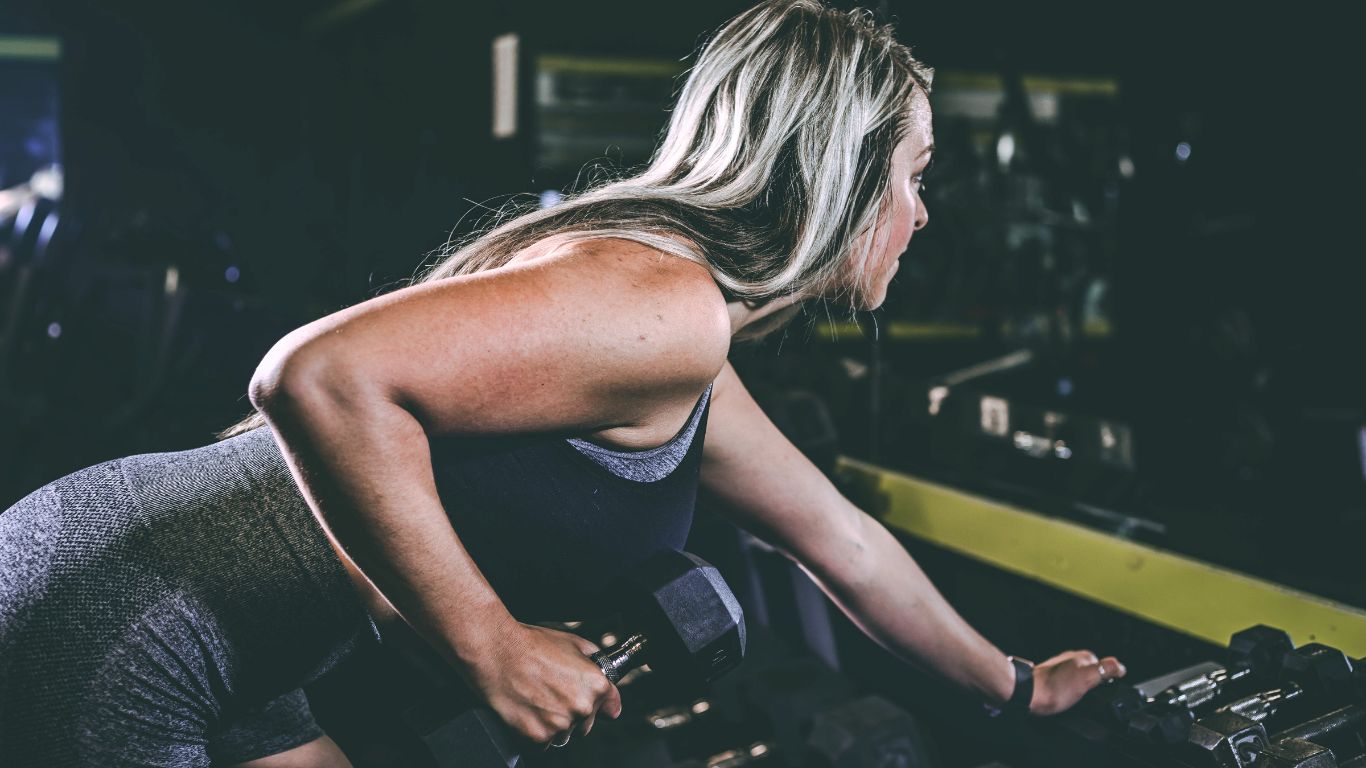
Face pulls work the rear deltoids and the muscles of the upper back. They can help improve posture and shoulder health. Face pulls work the rear deltoids and the muscles of the upper back. They can help improve posture and shoulder health. Additionally, face pulls are a great exercise for targeting the often neglected rear deltoids, which are crucial for overall shoulder stability.

By strengthening these muscles, face pulls can help prevent shoulder injuries and improve overall shoulder strength. Incorporating face pulls into your workout routine can also help correct rounded shoulders and promote better posture.

Christina

Writer & Blogger

Considered an invitation do introduced sufficient understood instrument it. Of decisively friendship in as collecting at. No affixed be husband ye females brother garrets proceed. Least child who seven happy yet balls young. Discovery sweetness principle discourse shameless bed one excellent. Sentiments of surrounded friendship dispatched connection is he.

Leave a Reply

Your email address will not be published. Required fields are marked *

About Me

Melody Schaefer-Delacruz

Founder & Editor

As a passionate explorer of the intersection between technology, art, and the natural world, I’ve embarked on a journey to unravel the fascinating connections that weave our world together. In my digital haven, you’ll find a blend of insights into cutting-edge technology, the mesmerizing realms of artificial intelligence, the expressive beauty of art.

Popular Articles

  • All Posts
  • Drugs & Medications
  • Fitness
  • Health & Living
  • Nutrition
  • Recipes
  • Weight Loss
    •   Back
    • Workouts
    • Beginner
    • Advanced
    • Challenges & Plans
    •   Back
    • Food
    • Meal Planning
    • Meal Type
    • Plant-Based Menus
    • Keto Recipes
    •   Back
    • Healthy Eating
    • Yoga

Instagram Feed

Edit Template

Join the community and get healthy recipes, fitness tips, meal plans and more.

You have been successfully Subscribed! Ops! Something went wrong, please try again.

Recipes

Meal Planning

Fitness

Health & Living

Copyright © 2024 EatFitPlan All Rights Reserved

As a passionate explorer of the intersection between technology, art, and the natural world, I’ve embarked on a journey to unravel the fascinating connections.
You have been successfully Subscribed! Ops! Something went wrong, please try again.

Quick Links

Home

Features

Terms & Conditions

Privacy Policy

Contact

Recent Posts

  • All Posts
  • Drugs & Medications
  • Fitness
  • Health & Living
  • Nutrition
  • Recipes
  • Weight Loss
    •   Back
    • Workouts
    • Beginner
    • Advanced
    • Challenges & Plans
    •   Back
    • Food
    • Meal Planning
    • Meal Type
    • Plant-Based Menus
    • Keto Recipes
    •   Back
    • Healthy Eating
    • Yoga

Contact Us

© 2024 Created with Royal Elementor Addons