How to Cook the Perfect Turkey and Gravy

perfect turkey and gravy

Getting a delicious perfect turkey and gravy ready for your holiday can seem hard. But, with the right steps and expert advice, you can do it. This guide will teach you how to cook a perfect turkey and make the best homemade gravy. Your guests will be amazed by your cooking skills. alt=”turkey and gravy” data-id=”136995372″ /> Key Takeaways Discover the essential equipment and high-quality ingredients needed for the perfect turkey and gravy Learn how to select the right turkey size for your gathering and the optimal cooking methods Master bringing techniques to ensure a juicy and flavorful turkey Explore seasoning and flavor enhancement options to elevate your turkey Uncover expert tips for achieving crispy turkey skin and creating rich, smooth gravy from scratch Equipment and Ingredients for Perfect Turkey and Gravy To make a tasty turkey and homemade gravy, you need more than basic stuff. You’ll want the best kitchen tools and ingredients. This will make your Thanksgiving dinner stand out. Kitchen Tools You’ll Need A large roasting pan with a sturdy rack for even cooking An accurate meat thermometer to check the turkey’s temperature A bulb baster for basting the turkey A sharp carving knife and fork for easy slicing A gravy separator to remove fat from drippings Premium Ingredients for Best Results For the turkey gravy recipe and homemade gravy recipe, choose the best ingredients. Pick a fresh, high-quality turkey. It should be free-range and organic. For the gravy, use homemade turkey stock or broth. Add fresh herbs and spices to make the flavors pop. Seasoning and Herbs Selection The right seasonings and herbs can make a big difference. Use thyme, rosemary, sage, and garlic to season the turkey. For the gravy, add fresh parsley, black pepper, and a bit of Worcestershire sauce. With the right tools and ingredients, you’re ready to make a delicious turkey gravy recipe and homemade gravy recipe. Your guests will love it this Thanksgiving. How to Select the Perfect Turkey Size for Your Gathering Choosing the right turkey size is key for your feast. It ensures everyone gets enough to eat, with maybe some left over. Here’s how to pick the perfect turkey for your event. Calculate Portions for Your Crowd Plan for 1-1.5 pounds of turkey per person. This includes the bone and lets everyone have big servings. For example: 4-6 guests: 6-8 pound turkey 8-10 guests: 12-15 pound turkey 12-15 guests: 18-22 pound turkey Remember, some guests might want more. It’s good to have a little extra. Consider Cooking Time and Equipment The turkey’s size affects cooking time. Bigger turkeys need more space and longer cooking. Make sure your oven is big enough and has enough time to cook it well. Turkey Size Approximate Cooking Time 8-12 pounds 2.5-3 hours 12-14 pounds 3-3.5 hours 14-18 pounds 3.5-4.5 hours 18-20 pounds 4.5-5 hours With the right turkey size, your turkey and gravy recipe feast will be a hit! The Complete Guide: How to Cook the Perfect Turkey and Gravy Cooking the perfect turkey and gravy is an art. It makes your Thanksgiving feast unforgettable. This guide will help you from start to finish. You’ll get a delicious turkey and rich gravy every time. Preparation Steps First, thaw your turkey in the fridge or cold water. Remove the giblets and rinse the turkey. Pat it dry with paper towels. If you want, stuff the turkey with bread or herbs. Onions, celery, and herbs add great flavor. Cooking Temperature Guidelines Heat your oven to 325°F (165°C). Put the turkey in a roasting pan, and breast up. Baste it often with juices. The turkey must be 165°F (74°C) in the breast and 175°F (79°C) in the thigh. This ensures it’s cooked right. Timing and Doneness Tests Use a meat thermometer to check the turkey’s temperature. Check it in several places. Cook for 13 to 15 minutes per pound (453 g) of turkey. Check the turkey’s doneness with a thermometer. Make sure the readings are right. Another way to check is when the juices are clear after piercing with a fork. Follow these steps and guidelines. You’ll cook a perfect turkey and gravy. Your family and guests will love it. Bringing Techniques for a Juicy Turkey To make the perfect turkey and gravy, start with the right prep. Brining is key for a moist, tasty turkey. It means soaking the turkey in a salty solution. This lets the meat soak up moisture and flavors. There are two main brining ways: wet and dry. Each has its benefits. Let’s look at them: Wet Brining Put the turkey in a saltwater mix. Use 1/2 cup of salt for every 1 gallon of water. Add herbs, peppercorns, and citrus peels for extra taste. Brine the turkey in the fridge for 12-24 hours. Make sure it’s fully covered. Dry Brining Spread salt all over the turkey, inside and out. Use 1-2 tablespoons for each pound. Put the turkey in the fridge, uncovered, for 12-24 hours. This lets the salt work its magic. The turkey will soak up the moisture again, making it juicy and flavorful. Choose your bringing method and give it enough time. With some prep, you’ll make a turkey and gravy recipe that wows everyone. alt=”turkey brining” data-id=”136995374″ /> “Brining is the secret to a moist, flavorful turkey. It’s a game-changer for your Thanksgiving feast.” Turkey Seasoning and Flavor Enhancement Methods Making your turkey taste amazing is key to a great Thanksgiving. You can use fragrant herb butter or bold dry rubs. These methods can make your turkey a real showstopper. Herb Butter Recipe Herb butter is a simple way to add flavor to your turkey. Mix softened butter with minced herbs like rosemary, thyme, and sage. Add a bit of salt and pepper too. Spread this butter under the turkey’s skin. This makes the skin crispy and the meat juicy and full of flavor. Marinade Options Wine and Citrus Marinade: Mix white wine, lemon juice, garlic, and herbs for a tangy marinade. Balsamic and Herb

Delicious Keto Bread Recipe (Easy Low-Carb Homemade Bread)

Keto Bread Recipe

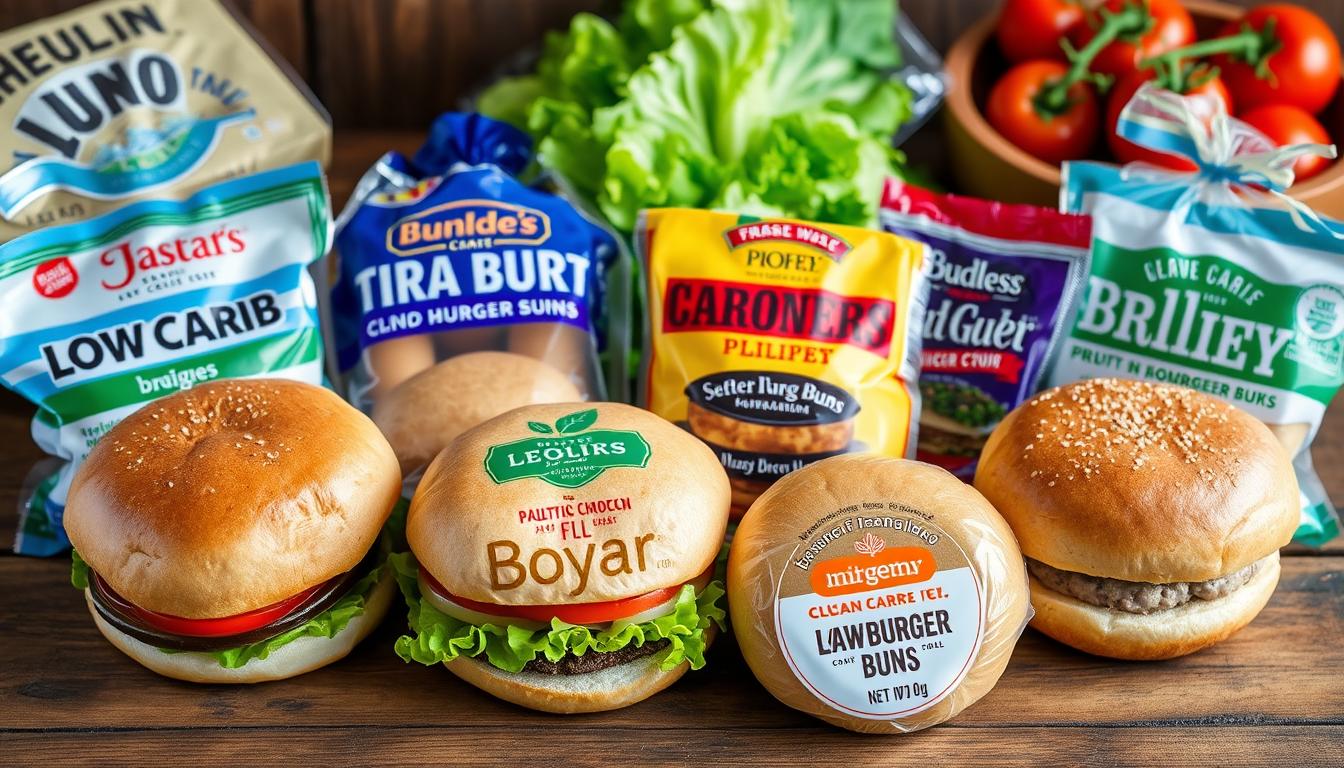
Starting a keto diet doesn’t mean you can’t enjoy fresh bread. You can make tasty low-carb bread at home. This recipe is simple and full of good stuff for your health and weight loss. Want toast, a sandwich, or a roll with your keto meal? This homemade keto bread is perfect. Say goodbye to high-carb store-bought bread and try baking your own. Key Takeaways Discover the benefits of making your keto-friendly bread at home. Learn about the essential ingredients and equipment needed for low-carb bread baking. Understand the science behind creating the perfect texture and rise in keto bread. Explore tips and tricks for troubleshooting common keto bread baking challenges. Enjoy a versatile keto bread recipe that can be used for a variety of low-carb dishes. Read More: 7-Day Vegan Meal Plan for Healthy Living Understanding the Basics of Low-Carb Bread Making Starting a keto lifestyle doesn’t mean you can’t enjoy fresh bread. You can make tasty keto bread with the right knowledge. Let’s learn how to make healthy and yummy keto bread. Common Keto-Friendly Flour Alternatives All-purpose flour is not good for low-carb baking because it has too many carbs. Try using almond flour, coconut flour, and psyllium husk powder instead. These flours help your bread turn out right and keep carbs low. Essential Equipment for Baking Keto Bread To bake great keto bread, you need some key tools. A good food processor or blender is important for making flour from nuts and seeds. Also, a digital scale is vital for measuring ingredients right. You’ll also need a strong loaf pan and parchment paper for easy bread release. The Science Behind Low-Carb Baking Knowing the science of low-carb baking helps solve problems and get perfect bread. Keto flours like almond and coconut are different from wheat flour. They need special care with binders, leavening, and baking times. Learning these tricks will make your keto bread better and more fun to make. Keto-Friendly Flour Carb Content (per 1/4 cup) Ideal Uses Almond Flour 3g net carbs Bread, muffins, cookies Coconut Flour 6g net carbs Bread, cakes, pancakes Psyllium Husk Powder 4g net carbs Bread, pasta, pizza crust Learning the basics of low-carb bread making is a great start. You’ll soon be making tasty and keto-friendly bread. Keep reading to learn more about how to make keto bread and low-carb baking. Benefits of Making Your Own Keto Bread Making your own homemade keto bread at home is great. It’s healthier and lets you change the recipe to fit your needs. One big plus is controlling what goes into your bread. You can avoid bad stuff like additives and sugars. This makes your bread better for you and fits your keto diet. Improved nutritional profile: You can make bread that’s good for you. It has less carbs and more healthy fats and proteins. Cost-effectiveness: Making keto bread at home saves money. You get a tasty treat without feeling guilty. Customization options: You can try new things in your bread. Add herbs, spices, or nut butters for extra flavor. By making your own homemade keto bread, you get a healthier, cheaper, and more personal treat. Enjoy making your own low-carb bread and enjoy the benefits of a great bread alternative. alt=”homemade keto bread” data-id=”136965123″ /> Essential Ingredients for the Perfect Keto Bread Recipe To make tasty keto bread at home, pick the right ingredients. The base of any good keto bread recipe is the flour. You can’t use regular wheat flour, but there are best keto bread ingredients that work well. Best Flour Combinations for Texture Almond flour and coconut flour are top choices for keto baking. They mix moisture, structure, and rise well. A mix of 70-80% almond flour and 20-30% coconut flour works best. Recommended Binding Agents Eggs: Whole eggs or egg whites help bind the ingredients and provide structure. Xanthan gum: This plant-based thickener is a crucial addition, as it mimics the gluten found in traditional bread. Psyllium husk powder: Another exceptional binder that enhances the texture and rise of keto breads. Natural Sweeteners and Flavor Enhancers A little natural sweetener can change the flavor a lot. Try erythritol, stevia, or mix them. Vanilla extract, cinnamon, or a bit of nut butter can also make your keto bread taste better. Choosing the right mix of almond flour, coconut flour, binders, and sweeteners makes perfect keto bread. It’s all about taste and texture. Step-by-Step Guide to Making Almond Flour Yeast Bread Making a tasty keto bread recipe with yeast from easy almond flour is easy. Just follow these steps to make a soft, low-carb bread. It’s great for your keto diet. Preheat your oven to 350°F (175°C) and grease a 9×5-inch loaf pan. In a large bowl, mix the dry stuff: almond flour, psyllium husk powder, baking powder, salt, and active dry yeast. In another bowl, mix the wet stuff: eggs, melted butter, warm water, and apple cider vinegar. Put the wet stuff into the dry stuff. Mix until it’s sticky dough. Spread the dough in the loaf pan. Use a spatula to smooth the top. Cover the dough and let it rise for 30-45 minutes. It should get a bit bigger. Bake the bread for 45-55 minutes. It’s done when a toothpick comes out clean. Let the bread cool down before you slice and serve it. Follow this guide to make a keto bread recipe with yeast using almond flour. It’s yummy and easy to make. Enjoy your homemade easy almond flour yeast bread in your low-carb diet. alt=”keto bread with almond flour” data-id=”136965125″ /> Ingredient Quantity Almond flour 2 cups Psyllium husk powder 2 tablespoons Baking powder 1 teaspoon Salt 1/2 teaspoon Active dry yeast 1 tablespoon Eggs 4 Melted butter 1/4 cup Warm water 1/4 cup Apple cider vinegar 1 teaspoon “Baking keto bread with yeast using almond flour is a game-changer for low-carb diets. This recipe yields a fluffy, satisfying loaf that’s perfect for sandwiches, toast, or just enjoying on its own.” Tips for Achieving the

7-Day Vegan Meal Plan for Healthy Living

Vegan Meal Plan for Healthy Living

Starting a plant-based diet can change your life. It’s good for your health and the planet. This 7-day vegan meal plan makes it easy to eat well every day. It’s perfect for anyone, whether you’re already vegan or just starting. You’ll find tasty ways to feed your body and feel great. Key Takeaways Discover the health advantages of a vegan diet, including improved cardiovascular health, increased energy, and better weight management. Learn about the environmental impact of plant-based eating and how it can contribute to a more sustainable future. Explore a wide range of nutrient-dense, delicious vegan recipes for breakfast, lunch, dinner, and snacks. Gain practical tips for stocking your kitchen with essential vegan ingredients and tools to make meal preparation a breeze. Develop strategies for successful meal planning and preparation to ensure a seamless transition to a vegan lifestyle. Read More: 7-Day Lazy Keto Meal Plan for Beginners Understanding the Benefits of a Plant-Based Lifestyle Switching to a vegan diet plan or plant-based lifestyle has many good points. It’s great for your health and the planet. Eating whole, unprocessed plant foods can make you feel better and help the Earth. Health Advantages of Vegan Nutrition Many studies show that a plant-based lifestyle improves health. Vegans often have lower body mass indexes. They also have less risk of heart disease, diabetes, and some cancers. They can better manage arthritis and high blood pressure too. Environmental Impact of Plant-Based Eating A plant-based diet is better for the environment than one with lots of animal products. It cuts down on carbon emissions, water use, and land use. This makes it a greener choice. Common Misconceptions About Vegan Diets Even though vegan diets are getting more popular, some myths still exist. People think it’s hard to get enough nutrients, that vegan meals are boring, and that vegan living is expensive. But, there are many resources and support for those who want to try a vegan diet plan. “Going vegan is one of the biggest ways individuals can reduce their environmental impact on the planet.” – The Vegan Society Knowing the benefits of a plant-based lifestyle helps people make better choices. They can add more vegan-friendly options to their daily life. This leads to better health, helps the environment, and makes eating more mindful. Essential Nutrients in a Vegan Meal Plan Choosing a vegan lifestyle is good for your health. But, you must make sure you get all the nutrients your body needs. A good vegan vegan nutrition diet gives you protein, vitamins, minerals, and healthy fats. Getting enough protein is a big worry for vegans. But, many plant-based nutrients are great protein sources. Foods like legumes, nuts, seeds, and soy products are full of protein. Eating a mix of these foods helps you get enough protein every day. Legumes (beans, lentils, peas) Nuts and seeds (almonds, chia, flax) Soy-based foods (tofu, tempeh, edamame) Quinoa and other whole grains Vegans also need to watch their vitamins and minerals. You need vitamin B12, iron, calcium, and omega-3s. Eating foods like leafy greens, fortified plant-based milks, and chia or flaxseeds helps you get these nutrients. Nutrient Vegan Sources Vitamin B12 Fortified plant-based milk, nutritional yeast, B12 supplements Iron Lentils, tofu, cashews, spinach, quinoa Calcium Fortified plant-based milk, tofu, leafy greens, almonds Omega-3s Chia seeds, flaxseeds, walnuts, algae supplements By eating a variety of plant-based nutrients and using supplements when needed, vegans can get all the nutrients they need. This way, they can enjoy all the benefits of a vegan nutrition lifestyle. alt=”vegan nutrition” data-id=”135562229″ /> Getting Started: Kitchen Essentials and Ingredient List Starting a vegan meal plan is easy with the right vegan kitchen essentials and plant-based ingredients. This guide helps you get ready for a 7-day vegan journey. It’s perfect for beginners or anyone wanting to try new things. Pantry Staples for Vegan Cooking Whole grains (quinoa, brown rice, oats, etc.) Legumes (lentils, chickpeas, black beans, etc.) Nuts and seeds (almonds, walnuts, chia, flax, etc.) Healthy oils (olive oil, coconut oil, avocado oil) Spices and herbs (turmeric, cumin, oregano, basil) Condiments (soy sauce, Dijon mustard, balsamic vinegar) Plant-based milk alternatives (almond milk, soy milk, oat milk) Fresh Produce Shopping Guide Don’t forget to buy fresh produce too. You’ll need: Leafy greens (spinach, kale, swiss chard) Colorful vegetables (bell peppers, carrots, broccoli) Fruits (bananas, berries, avocados, citrus) Herbs (parsley, cilantro, basil, rosemary) Essential Kitchen Tools Having the right tools makes vegan cooking easy. Get these essentials: High-quality chef’s knife Cutting boards Blender or food processor Saucepans and skillets Baking sheets and dishes Measuring cups and spoons Mixing bowls With your kitchen ready, you can start making tasty vegan meals. Enjoy exploring new vegan kitchen essentials and plant-based ingredients. Breakfast Options in Your Vegan Meal Plan Starting your day vegan doesn’t mean missing out. You can find lots of tasty vegan breakfast ideas and plant-based morning meals. These options are both delicious and good for you. Try a Tofu Scramble to begin your day. It’s made with tofu, turmeric, garlic, and veggies. Or, go for a Quinoa Breakfast Bowl with sweet potatoes, avocado, and plant-based yogurt. alt=”vegan breakfast ideas” data-id=”135562231″ /> Need something quick? Make a Vegan Breakfast Burrito with tofu, black beans, and vegan cheese. Or, try Overnight Oats with chia seeds, berries, and maple syrup for a quick breakfast. For a boost, have a Protein-Packed Smoothie. It’s made with protein powder, almond milk, spinach, and fruits. Add a Vegan Breakfast Sandwich on a whole-grain muffin for a full meal. These vegan breakfast ideas and plant-based morning meals will give you the energy to start your day right. They’re packed with nutrients and taste great. Nutritious Lunch Ideas for the Week Making a healthy vegan lunch is easy. Just prep a bit and use what you have at home. You’ll find tasty and healthy plant-based meals for the week. This section has vegan lunch ideas that are quick, easy, and full of protein. Quick and Easy Lunch Recipes Need something fast? Try these tasty vegan

How to Get a Nice Butt in Three Weeks

How to Get a Nice Butt in Three Weeks

Getting a nice butt in just three weeks is possible with the right exercises and dedication. This guide will walk you through understanding your glutes, essential workouts, and nutrition tips to help you achieve your goal. Whether you’re a beginner or have some experience, these steps will help you tone and shape your butt effectively. Key Takeaways Learn about the three main glute muscles to target them effectively. Use the right equipment like dumbbells and mats for better workouts. Start with basic exercises and gradually increase the intensity each week. Include high-protein foods in your diet for muscle growth. Stay motivated by setting goals and celebrating small achievements. Understanding the Anatomy of Your Glutes The Three Major Gluteal Muscles The glutes are made up of three main muscles: the gluteus maximus, gluteus medius, and gluteus minimus. The gluteus maximus is the largest of the gluteal muscles and is responsible for the shape of the buttocks. It plays a crucial role in movements like standing up, climbing stairs, and maintaining balance. The other two muscles help stabilize the pelvis and support hip movements. How Glute Muscles Affect Your Posture Strong glute muscles are essential for good posture. They help keep the pelvis aligned and support the lower back. When the glutes are weak, it can lead to poor posture, which may cause discomfort and pain. Strengthening the glutes can improve overall body alignment and reduce the risk of injuries. Common Myths About Glute Training There are several myths surrounding glute training that can mislead individuals: Spot reduction: Many believe they can lose fat in just one area, but fat loss occurs throughout the body. Only squats matter: While squats are great, a variety of exercises like lunges and donkey kicks are also important for comprehensive glute development. More is better: Overtraining can lead to injuries. It’s essential to allow time for recovery. Understanding the anatomy of the glutes is the first step towards achieving a nice butt. By focusing on the right exercises and maintaining proper form, anyone can enhance their glute strength and appearance. Essential Equipment for Butt Workouts To achieve a nice butt, having the right equipment is essential. Investing in quality gear can make a significant difference in your workout experience and results. Here are some key items to consider: Choosing the Right Dumbbells Weight Range: Select dumbbells that range from light to medium (5-20 lbs) to accommodate various exercises. Grip Comfort: Ensure the handles are comfortable to hold, as this will help maintain proper form during workouts. Versatility: Look for adjustable dumbbells if you want to save space and have multiple weight options. The Importance of a Good Gym Mat Cushioning: A good mat provides cushioning for your joints during floor exercises. Stability: It helps prevent slipping, allowing for safer movements. Durability: Choose a mat that can withstand regular use without wearing out quickly. Using Benches and Steps Effectively Variety of Exercises: Benches and steps can be used for various exercises like step-ups and Bulgarian split squats. Height Options: Ensure the height is suitable for your fitness level to avoid injury. Sturdiness: Always check that the equipment is stable and can support your weight during workouts. Remember, the right equipment not only enhances your workout but also keeps you motivated to stick with your routine. By investing in these essential items, you can create an effective workout environment that supports your goals for a firmer, more toned butt. Summary Table of Essential Equipment Equipment Purpose Key Features Dumbbells Strength training for glutes Adjustable weight, comfortable grip Gym Mat Cushioning and stability Non-slip, durable Bench/Step Variety of exercises Sturdy, appropriate height Week 1: Building a Strong Foundation Mastering the Basic Squat The squat is a fundamental exercise that targets the glutes, quads, and hamstrings. Proper form is essential to maximize benefits and prevent injuries. Here’s how to do it: Stand with feet shoulder-width apart. Lower your body as if sitting back into a chair, keeping your chest up and knees behind your toes. Push through your heels to return to standing. Incorporating Lunges into Your Routine Lunges are another great way to strengthen the glutes. They also improve balance and coordination. Here’s a simple way to perform lunges: Step forward with one leg, lowering your hips until both knees are bent at about a 90-degree angle. Keep your front knee directly above your ankle. Push back to the starting position and switch legs. The Benefits of Donkey Kicks Donkey kicks are excellent for isolating the glute muscles. They help in building strength and shape. To perform a donkey kick: Start on all fours, with your hands under your shoulders and knees under your hips. Keeping your knee bent, lift one leg towards the ceiling. Lower it back down without touching the ground and repeat. Building a strong foundation in the first week is crucial for achieving a nice butt. By mastering these basic exercises, individuals can prepare their bodies for more intense workouts in the following weeks. In summary, focusing on these three exercises will help in developing a solid base for glute training. Remember to maintain good form and listen to your body as you progress! Week 2: Increasing Intensity As the second week begins, it’s time to step up the challenge and focus on building strength in your glutes. This week, the goal is to increase the intensity of your workouts to maximize your glute gains Here’s how to do it: Adding Weight to Your Squats Adding weight to your squats can significantly enhance your workout. Here are some tips: Start with light dumbbells to ensure proper form. Gradually increase the weight as you become more comfortable. Aim for 3 sets of 15-20 reps. Perfecting the Straight Leg Deadlift The straight-leg deadlift is a fantastic exercise for targeting the hamstrings and glutes. To perform it: Stand with feet hip-width apart, holding a dumbbell in each hand. Keep your back straight and hinge at the hips, lowering the weights towards the ground. Return to standing by

Best Leg Workout Gym Female Guide for Beginners

Best Leg Workout Gym Female Guide for Beginners

I’m excited to share my knowledge on the best leg workout for women at the gym. This guide is perfect for beginners and experienced gym-goers alike. It covers everything you need to know to strengthen your lower body. Strong, shapely legs are not just good-looking. They’re also key for fitness, stability, and moving well. In this article, I’ll show you the best exercises, equipment, and tips. You’ll learn how to create a leg workout routine that works. alt=”leg workout gym female” data-id=”134769252″ /> Key Takeaways Discover the best leg exercises for women to tone and strengthen your lower body Learn how to properly set up your gym equipment and select the right weights for an effective leg workout Understand the importance of proper form and technique to maximize results and prevent injury Gain insights on creating a balanced leg workout routine that targets all major muscle groups Explore tips and strategies to stay motivated and progress toward your fitness goals Essential Equipment and Gym Setup for Leg Workout Gym Female Training Getting the most from your leg day workouts depends on the right gym equipment. As a female fitness lover, knowing the key tools is vital. They help target and tone your powerful leg muscles. Choosing the Right Weight Machines Leg exercises gym has many weight machines for different muscles. You’ll find the leg press, squat rack, leg extension, and hamstring curl. Try different machines to find what works best for you. Read More: 10 Best T-Bar Row Alternatives Free Weights and Equipment Selection Free weights like dumbbells and barbells are also key for a good leg day. They offer more movement and help build strength and definition. Pick a weight that’s challenging but still lets you keep good form. Proper Gym Attire and Accessories The right gym clothes and accessories matter a lot. Wear comfy, moisture-wicking leggings or shorts and a supportive sports bra. Bring a water bottle and towel to stay hydrated and fresh. With the right equipment and setup, your leg day workouts will be both effective and fun. You’ll be on your way to strong, toned legs. Fundamental Leg Exercises to Build Strength and Definition Building strong, defined legs starts with the right gym exercises. Beginners should focus on exercises that work the quadriceps, hamstrings, and glutes. These exercises will help you get the strong, toned legs you want. The squat is a great exercise for the legs. It works the quadriceps, hamstrings, and glutes. Make sure to keep your chest up and knees over your toes when squatting. alt=”best leg exercises” data-id=”134769254″ /> The deadlift is also key for strong legs. It works the hamstrings and glutes. Start with a light weight and focus on keeping your back straight and hips moving. Calf raises are important for strong calves. Doing these exercises at the gym will help you get the lean, muscular legs you want. Conclusion As we wrap up this guide, remember to stay consistent and use the right form. These leg workout gym female exercises are key. Add a good diet and keep getting stronger to see big changes in your legs. Being consistent is crucial. Stick to your leg day workout plan, even if it’s just a few times a week. Small steps lead to big changes. Every best leg workout session makes your legs stronger. Keep going and celebrate your small wins. Every little bit counts. Enjoy the journey and feel proud of your progress. Let’s tackle the leg workout gym challenges together and reach our fitness goals. FAQ What are the best leg exercises for women at the gym? The top leg exercises for women include squats, lunges, and deadlifts. Also, leg presses, calf raises, and hamstring curls are great. These exercises work on the quads, hamstrings, glutes, and calves. They help build strength and shape. How often should I work on my legs at the gym? I suggest doing leg workouts 2-3 times a week. This helps your muscles recover and get stronger. It’s key for building strong legs. What equipment do I need for an effective leg workout at the gym? You’ll need free weights and weight machines for a good leg workout. Also, bodyweight exercises are helpful. Having different equipment lets you work all leg muscles. How can I ensure proper form when doing leg exercises at the gym? Proper form is very important. Start with light weights and focus on how you move. Increase the weight as you get better. Ask for help if you’re unsure about your form. What are some tips for staying motivated during leg day workouts? To stay motivated, set goals and track your progress. Reward yourself after each workout. Try new exercises to keep it fun. Having a workout buddy or joining a fitness group can also help.

10 Detoxifying Yoga Poses

Group practicing detoxifying yoga poses in a bright studio.

Yoga is not just about relaxation; it can also help detoxify your body. By practicing specific poses, you can stimulate your organs and improve your overall wellness. Here are ten detoxifying yoga poses that can help you cleanse your body and feel rejuvenated. Key Takeaways Detoxifying yoga poses can stimulate your organs and improve circulation. Regular practice of these poses helps in reducing toxins in your body. Incorporating twists and bends in yoga enhances digestion and detoxification. These poses can also boost your strength and flexibility. Practicing yoga can be a great way to relax and clear your mind. 1. Seated Spinal Twist The Seated Spinal Twist is a fantastic pose for enhancing flexibility and promoting detoxification. This gentle twist helps massage the internal organs, which can aid in digestion and improve blood circulation. Here’s how to perform this pose: Sit down with your legs extended in front of you, ensuring your back is straight. Bend your right knee and place your foot on the outside of your left thigh. Place your right hand on the mat behind you for support, and twist your torso to the right, using your left arm to hug your right knee. Keep your spine long and your shoulders relaxed as you breathe deeply. Hold the pose for at least five breaths, then switch sides. Benefits of Seated Spinal Twist Improves spinal flexibility Massages the abdominal organs Enhances blood circulation This pose is not just about the twist; it’s about creating space in the body and allowing energy to flow freely. Incorporating the Seated Spinal Twist into your routine can help you feel more energized and balanced. Remember to listen to your body and avoid any strain, especially if you have any back issues. Enjoy the benefits of this wonderful pose! 2. Head-To-Knee Forward Bend The Head-To-Knee Forward Bend is a wonderful pose that helps to stretch the back and legs while promoting relaxation. This pose is also known as Dandayamana Janu Sirsasana and is great for enhancing flexibility in the hips and relieving tension in the back. Steps to Perform the Pose: Sit on the floor with one leg extended straight in front of you and the other leg bent, with the knee pointing to the side. Inhale deeply and raise your arms overhead, lengthening your spine. Exhale as you hinge forward from your waist, keeping your back straight. Reach for your ankle or foot, allowing your head and neck to relax forward. Hold the pose for 20 to 30 seconds, then slowly return to the starting position and repeat on the other side. Benefits of the Head-To-Knee Forward Bend: Strengthens the lower back, legs, and hips. Stretches the entire back and hamstrings. Enhances circulation and supports internal cleansing processes. This pose not only helps in improving flexibility but also gently compresses the abdomen, which can stimulate organs like the liver and kidneys, potentially boosting their function. Incorporating the Head-To-Knee Forward Bend into a regular yoga practice can lead to a more balanced and detoxified body, making it a valuable addition to any routine. 3. Downward Facing Dog Downward Facing Dog, or Adho Mukha Svanasana, is a fantastic pose for detoxifying the body. This pose helps to stretch the back of the lower body and strengthen the shoulders. It is an inversion, meaning your heart is above your head, which encourages blood flow in a different direction, helping to rinse out lymph nodes. Steps to Perform Downward Facing Dog: Start in a tabletop position with your hands under your shoulders and knees under your hips. Tuck your toes under and press into your hands, lifting your hips up towards the ceiling. Spread your fingers wide, with the middle finger pointing forward, and keep your palms shoulder-width apart. Push your hips back and up, bringing your chest closer to your thighs while keeping your spine long. Position your feet hip-width apart, pressing your heels into the floor to feel a deep stretch in your legs. Let your head hang freely or look up at your belly button. Hold the pose for 4-8 breaths before gently lowering back to the tabletop position or transitioning to the Child’s Pose. Benefits of Downward Facing Dog: Strengthens the arms, shoulders, and back. Stretches the calves, glutes, and hamstrings. Promotes detoxification by encouraging blood circulation. Downward Facing Dog is not just a pose; it’s a way to find stability and flexibility in both body and mind. It can be a refreshing break in your yoga practice, allowing you to reset and recharge. 4. Twisted Chair Twisted Chair is a fantastic pose that not only strengthens the body but also promotes detoxification. This pose helps to wring out what you don’t need, making it a great addition to any detox routine. Benefits of Twisted Chair Strengthens the low back and core. Increases flexibility in the spine. Tones internal organs, especially the digestive system. How to Perform Twisted Chair Start in Tadasana (Mountain Pose). Bend your knees and lower your hips until your thighs are nearly parallel to the ground. Spread your toes and press your heels into the floor for stability. Bring your hands to heart center and widen your elbows to lengthen your side body. Twist from your navel to the right, hooking your left elbow onto your thigh or knee. If your elbow doesn’t reach, that’s okay—just twist as much as you can. Inhale to lengthen your spine, and exhale to deepen the twist. Hold for 5 breaths. Repeat on the left side. Twisted Chair challenges both the body and mind, combining strength, flexibility, and detoxification in one powerful pose. 5. Eagle Pose Eagle Pose, also known as Garudasana, is a fantastic yoga position that helps improve circulation and detoxify the body. This pose is great for boosting overall health by supporting the body’s natural detoxification mechanisms. It stretches various joints, including the ankles, elbows, knees, and hips, making it a well-rounded choice for anyone looking to enhance their yoga practice. Benefits of Eagle Pose Improves balance: This

Your Guide to How to Eat Healthy on a Budget

How to Eat Healthy on a Budget

I’ve learned how to eat well even when money is tight. I’m here to share my tips with you. This guide will show you how to eat healthy without spending too much. Discover my proven strategies for how to eat healthy on a budget while maximizing nutrition. Get practical tips for smart grocery shopping and meal planning that save money alt=”How to Eat Healthy on a Budget” data-id=”133113507″ /> Key Takeaways Debunking common misconceptions about the cost of healthy food Identifying essential nutrients that can be obtained on a tight budget Mastering the art of smart meal planning to save money Discovering affordable protein sources for balanced nutrition Leveraging seasonal produce and local farmer’s markets to maximize savings We’ll uncover the secrets of eating well on a budget together. You’ll learn how to eat healthy without spending too much. Let’s start exploring how to eat well on a budget! Read More: Easy Homemade Chicken Chili Recipe  15 Quick and Delicious Low Carb Breakfast Recipes 7-Day Best Meal Plan for Weight Loss that Works Understanding the Basics of Budget-Friendly Nutrition Eating healthy doesn’t have to cost a lot. Many think it’s expensive, but it’s not. You can eat healthy on a low budget with smart choices. Common Misconceptions About Healthy Food Costs People often think fresh foods cost more than packaged ones. But, foods like beans, lentils, eggs, and frozen veggies are cheap. Also, not all organic produce is needed to eat well. You can find affordable, healthy options. The Real Cost of Unhealthy Eating Habits While cheap foods might seem good, they can harm your health. Conditions like heart disease and diabetes come from bad diets. Eating well now saves money and health problems later. Essential Nutrients on a Tight Budget Protein: Lean meats, poultry, eggs, legumes, and dairy products Fiber: Whole grains, fruits, and vegetables Vitamins and minerals: Leafy greens, citrus fruits, bell peppers, and sweet potatoes Focus on these foods to stay healthy without spending a lot. With planning and creativity, eating healthy on a low budget is possible. Smart Meal Planning Strategies That Save Money Eating healthy doesn’t have to cost a lot. You can make tasty, healthy meals without spending too much. One smart way is to plan meals that use cheap, healthy foods. First, check what you have in your pantry and fridge. Look for things like whole grains, beans, lentils, and frozen veggies. These are cheap and full of good stuff. Use them to make a meal plan that you can change up all week. Batch cook grains, proteins, and veggies to make different meals Choose recipes that use the same ingredients to cut down on waste Try meatless meals a few times a week to save money on meat Another smart move is to use leftovers. Set aside one night a week for leftover meals. Get creative with leftovers, like turning roasted veggies into soup or making a stir-fry with extra chicken. Meal Planning Tip Potential Savings Batch cooking Up to 30% less food costs each week Using leftovers Up to 15% less food waste each week Choosing plant-based meals Up to 25% less meat costs each week By using these smart meal planning tips, you can eat well and save money. Being organized and choosing affordable foods are the secrets to eating on a budget without losing out on taste or health. alt=”meal planning tips” data-id=”133113509″ /> How to Eat Healthy on a Budget: A Complete Guide Eating healthy doesn’t have to cost a lot. You can eat well without spending too much. This guide will show you how to do it, from meal prep to saving money. Weekly Meal Prep Basics Meal prep changes the game for budget eating. It saves money and reduces waste. Start with simple recipes that use affordable, long-lasting ingredients. Cook in bulk to save time and money Use whole grains, lean proteins, and fresh veggies Freeze meals for later Shopping List Essentials For cheap, healthy food, make a good shopping list. Focus on basics like eggs, beans, and whole grains. Avoid expensive, processed foods. Item Average Cost (per pound) Eggs $2.50 Dried Beans $1.50 Frozen Broccoli $1.75 Whole Wheat Bread $3.00 Storage Solutions for Extended Shelf Life Good storage keeps food fresh longer. Use airtight containers and freezer bags. This cuts down on waste and keeps food ready to eat. With these tips, you can eat healthily without spending a lot. A little planning and a full pantry make it easy. Affordable Protein Sources for Balanced Nutrition Keeping a balanced diet can be hard when money is tight. But, there are many cheap protein sources to help. As someone who loves nutrition on a budget, I’m excited to share some affordable options. These will make your meals healthy and tasty. Beans are a great and cheap protein choice. You can find them canned or dried. Beans are full of plant-based protein, fiber, and minerals. Try lentils, chickpeas, or black beans in soups, stews, and veggie dishes. Eggs are another affordable animal protein. They’re full of protein and vitamins. Eggs can be cooked in many ways. Add them to whole grains and veggies for a balanced, nutrition on a budget meal. Canned tuna or salmon are also good protein sources. They’re not just protein but also omega-3s for your heart. Use them in salads, sandwiches, or pasta. “Eating healthy on a budget is all about being creative and embracing affordable, nutrient-dense ingredients.” By trying these nutrition on a budget options, you can eat well without spending too much. A little planning and trying new recipes can help keep you healthy, even when money is tight. alt=”affordable protein sources” data-id=”133113511″ /> Seasonal Shopping: Making the Most of Fresh Produce Healthy eating on a budget gets easier with seasonal produce. Buying fruits and veggies when they’re in season boosts nutrition and saves money. Best Times to Buy Different Fruits and Vegetables Some fruits and veggies grow better at certain times. Tomatoes are best in summer, and spinach and

7-Day Healthy Meal Plan for Balanced Nutrition

7-Day Healthy Meal Plan for Balanced Nutrition

I love a good balanced diet. I’m excited to share a 7-day meal plan that’s both healthy and tasty. It’s perfect for keeping up with a busy life while still eating well. This plan offers lots of healthy, filling meals. It’s great for anyone wanting to eat better, feel more energetic, or just enjoy tasty food. You’ll find it easy to stick to. alt=”Healthy Meal Plan” data-id=”133110396″ /> Key Takeaways 7-day healthy meal plan for balanced nutrition Variety of wholesome, nutrient-dense meals Designed to support wellness goals and energy levels Easy to incorporate into a busy lifestyle Emphasis on delicious, satisfying food Understanding the Basics of Balanced Nutrition Eating well is key to feeling good. A good healthy diet gives your body what it needs every day. Knowing about macronutrients and portion sizes helps make a diet that lasts. Essential Nutrients Your Body Needs Daily A good diet has many essential nutrients. These include: Carbohydrates for energy Proteins for muscle growth and repair Healthy fats for hormone production and brain function Vitamins and minerals for the immune system, bone health, and more The Role of Macronutrients in Your Diet Macronutrients like carbs, proteins, and fats give you calories. Eating the right mix is key for balanced nutrition and energy. Importance of Portion Control How much you eat matters a lot. Eating the right amount helps avoid too much weight and health problems. Watch your serving sizes and listen to your body to keep a healthy diet. “The key to a balanced diet is to consume the right amounts of each essential nutrient, not just to focus on one or two.” How to Get Started with a Healthy Meal Plan Starting a healthy meal plan might seem hard. But, it can be easy and fun with the right steps. Begin small, set easy goals, and build a meal plan that fits you. Here’s how to start: Assess Your Current Eating Habits: Look at what you eat, how often you snack, and how much you eat. This helps you see what to change. Determine Your Nutritional Needs: Think about your age, how active you are, and any health issues. Talk to a dietitian to learn what nutrients you need. Set Realistic Goals: Know what you want from your meal plan. Do you want to lose weight, feel more energetic, or manage a health problem? Make your goal clear and reachable. Explore Meal Prep Strategies: Spend a few hours each week on meal prep. Look for recipes, get the right kitchen tools, and make a shopping list. This makes meal prep easier. Embrace Flexibility: A healthy meal plan is not the same for everyone. Try new recipes, adjust how much you eat, and find what works for you. By following these steps, you’re on your way to a meal plan, healthy meal prep, and diet meal plans that help your health. Keep going, celebrate your wins, and enjoy the journey to a healthier life. alt=”meal plan” data-id=”133110398″ /> “The key to a successful meal plan is to find a balance between nutrition, taste, and convenience. With a little planning and preparation, you can create a healthy eating routine that becomes a natural part of your lifestyle.” Smart Shopping Guide for Your Weekly Meal Prep Healthy meals at home change your nutrition. It starts with smart shopping. Make a good shopping list, pick the best ingredients, and stay within your budget. Let’s look at how to make your meal prep easier. 7-Day Best Meal Plan for Weight Loss that Works Easy Homemade Chicken Chili Recipe Creating an Efficient Shopping List A good grocery list is key for meal prep. First, look at your meal plan and see what you already have. This helps you know what to buy. Organize your list by type, like fruits, meats, and pantry items, to make shopping easier. Choosing Fresh vs. Frozen Ingredients Choosing between fresh and frozen is important. Fresh is great for taste and nutrients, but frozen is cheaper and lasts longer. Mix both to make healthy meals. Budget-Friendly Shopping Tips Eating healthy doesn’t have to cost a lot. Here are tips to save money: Buy in-season produce for less Look at unit prices for the best deals Choose store-brand items for pantry staples Use sales, coupons, and loyalty programs Meal prep in batches to save food and ingredients Follow these tips for a healthy meal prep that’s easy on your wallet. Enjoy your journey to better nutrition! Kitchen Tools and Equipment for Successful Meal Planning I love cooking at home. The right tools make it easier. From containers to cookware, they help me cook and eat healthily. I bought BPA-free meal prep containers. They help me pack meals in advance. I can store everything from chicken to salads in them. A good set of knives is key. Sharp knives make chopping easy. I use a chef’s knife, paring knife, and serrated knife the most. Meal prep containers High-quality knives (chef’s knife, paring knife, serrated knife) Slow cooker or Instant Pot for hands-off cooking Blender or food processor for smoothies, purees, and more Sheet pans and baking dishes for roasting and baking A slow cooker or Instant Pot changed my cooking. They make healthy meals easy. A blender or food processor is great for smoothies and sauces. Sheet pans and baking dishes are also essential. They help me roast and bake with less cleanup. These meal prep tools, kitchen equipment, and healthy cooking essentials help me plan meals better. Now, I can enjoy healthy meals all week. alt=”meal prep tools” data-id=”133110400″ /> Breakfast Options for a Nutritious Start Starting your day with a healthy breakfast is key. It keeps you energized and focused. There are many tasty and healthy choices to start your day. Quick and Easy Morning Meals When you’re short on time, try simple breakfasts. Overnight oats, avocado toast, or a hard-boiled egg are great. These healthy breakfast ideas are quick and nutritious. Make-Ahead Breakfast Ideas Plan for a stress-free morning. Make healthy muffins,

High Protein Breakfast Burrito: Quick & Easy Recipe

High Protein Breakfast Burrito

Start your day with a tasty high protein breakfast burrito. It’s both healthy and yummy. This recipe is great for when you’re in a hurry, perfect for a quick meal or prep. The burrito has lots of protein to help you stay full. It also gives you energy all morning. This makes it a great choice for a healthy start. alt=”High Protein Breakfast Burrito” data-id=”133122217″ /> Key Takeaways High protein breakfast burrito is a quick and easy recipe for busy mornings The recipe supports weight management goals with its high protein content Balanced macros provide sustained energy throughout the morning Suitable for meal prep and can be made ahead of time A delicious and nutritious way to start the day Benefits of Starting Your Day with a Protein-Packed Breakfast Starting your day with a protein-packed breakfast is very good for you. It helps with weight management, muscle health, and blood sugar levels. A high-protein breakfast is very powerful. Weight Management and Muscle Support Protein is key for a healthy weight and strong muscles. Eating a protein-packed breakfast gives your body what it needs. This helps you keep and build lean muscle. This also boosts your metabolism and cuts down on cravings. It makes it easier to lose weight. Sustained Energy Throughout the Morning A low calorie high protein breakfast gives you the energy that lasts. It’s different from breakfasts heavy in carbs. Those can make your blood sugar go up and down. Protein takes longer to digest. This keeps you full and focused longer. It stops you from snacking too much in the morning. Blood Sugar Control Benefits Protein helps control blood sugar levels. This is great for people with or at risk of diabetes. Eating a protein-packed breakfast keeps your blood sugar stable. This prevents energy crashes and cravings. It’s a big help. In short, starting your day with a high-protein breakfast is very good. It supports your health, helps with weight, and makes you feel ready for the day. Essential Ingredients for a High Protein Breakfast Burrito Making a tasty and healthy breakfast burrito begins with picking the right stuff. Choose high protein foods like eggs, lean meats, and low-fat dairy. These add protein to your morning meal. Use whole grain tortillas or wraps for a fiber-rich base. They give you complex carbs for energy and help keep your blood sugar stable. Add fresh veggies like spinach, bell peppers, and onions to make it even healthier. If you follow special diets, don’t worry. Vegans and vegetarians can use tofu, tempeh, or legumes. People watching their calories or carbs can try lettuce wraps or low-carb tortillas. Ingredient Protein (g) Calories Eggs (2 large) 12 140 Lean turkey bacon (2 slices) 6 70 Low-fat cheddar cheese (1 oz) 7 80 Whole grain tortilla (1) 5 120 By picking the right high protein, low-calorie ingredients, you make a breakfast burrito that lasts. It gives you energy and helps you reach your health goals. alt=”breakfast burrito ingredients” data-id=”133122219″ /> Step-by-Step Recipe Instructions Prep Work and Ingredient Organization Before cooking, make sure all ingredients are ready. Get eggs, lean protein, veggies, and whole-grain tortillas. Make your workspace neat for easy cooking. Cooking Process Start by scrambling eggs in a greased skillet. Add protein like turkey bacon or chicken. Cook until it’s hot. Then, sauté veggies like bell peppers and onions. Cook them until they’re tender but still crisp. Assembly Techniques Place a warm tortilla on a clean surface. Put the egg and protein mix in the middle. Add sautéed veggies on top. Fold the bottom up, then the sides. Roll it tightly. You can use a toothpick to hold it or serve without. For extra flavor, add Greek yogurt, cheese, or hot sauce. Make your burrito your own. Follow these steps for a tasty, high protein breakfast burrito. It will keep you full and energized all morning. Enjoy! Nutritional Information and Macros This high protein breakfast burrito is tasty and full of good stuff for your body. It has 350 calories, 25 grams of protein, 35 grams of carbs, and 15 grams of healthy fats. It’s better than a regular breakfast sandwich or cereal because it’s more filling and full of nutrients. The lean turkey, fluffy eggs, and black beans make it great for weight management or muscle support. The carbs and protein give you energy that lasts, and the fiber keeps your blood sugar steady. This burrito is good for any diet, whether you’re watching carbs, eating a lot of protein, or following a balanced diet. This burrito is a great way to start your day. It’s full of nutrients and tastes amazing. Enjoy it and take care of your health and wellness. FAQ Are breakfast burritos good for weight loss? Yes, breakfast burritos can help with weight loss. They should have high protein and low calories. This makes you feel full and helps with weight management. What is a low-calorie, high-protein breakfast? A good breakfast burrito has lean protein and veggies. It might have eggs, turkey, or lean beef. Use whole-grain tortillas for a healthy start. How do I make a healthy breakfast burrito? Choose lean protein and veggies for your burrito. Use egg whites, chicken, or turkey. Add spinach, bell peppers, and onions. Pick a whole-wheat tortilla for a balanced meal. What are the benefits of a high-protein breakfast? High-protein breakfasts help with weight and muscle. They give you energy and keep blood sugar stable. What are the key ingredients in a high-protein breakfast burrito? Your burrito needs eggs, lean meats, and veggies. Add low-fat cheese for extra protein. Use whole-grain tortillas for a healthy base.

7-Day Best Meal Plan for Weight Loss that Works

7-Day Best Meal Plan for Weight Loss that Works

I’ve struggled with weight management too. Finding a good meal plan is hard. But, I’m excited to share a 7-day meal plan that helps with weight loss. This plan focuses on balanced nutrition. It also teaches portion control and the right time to eat. These tips help you reach your weight loss goals. alt=”best meal plan for weight loss” data-id=”133054302″ /> Key Takeaways Comprehensive 7-day meal plan for effective weight loss Balanced nutrition, portion control, and strategic meal timing Sustainable weight loss through a well-structured eating plan Designed to boost metabolism and keep you feeling energised Easy-to-follow recipes and meal preparation tips Understanding the Science Behind Effective Weight Loss Meal Planning Want to lose weight? Knowing the science of meal planning is key. Learn about caloric deficit, macronutrients, and meal timing. This will help you lose weight easily and keep it off. The Role of Caloric Deficit in Weight Management Weight loss starts with a caloric deficit. This means eating fewer calories than your body uses. Your body then uses fat for energy, leading to weight loss. Track your calories and match them with your activity. This helps you lose weight slowly but surely. Balancing Macronutrients for Optimal Results Macronutrients like proteins, carbs, and fats are also important. They help you feel full and give you energy. A balanced meal plan supports lean muscle and helps you lose weight. Why Timing Matters in Your Weight Loss Journey When you eat matters too. Meal timing affects your metabolism and hunger. It helps you stick to a weight loss plan. Understanding these principles lets you plan meals for weight loss. A balanced plan with the right timing can help you reach your goals. Best Meal Plan for Weight Loss: A Comprehensive Guide If you want to lose weight, you’re in the right place. This guide will show you a 7-day meal plan. It’s full of balanced food and helps you eat less to lose weight. This plan is easy to follow and doesn’t make you feel hungry. You’ll eat tasty, healthy meals that you like. It helps you eat the right amount of food without feeling hungry. Day Breakfast Lunch Dinner Snacks Monday Oats with berries and Greek yogurt Grilled chicken salad with mixed greens Baked salmon with roasted vegetables Apple and almond butter Tuesday Egg white omelette with spinach and tomatoes Tuna and avocado lettuce wraps Lean beef stir-fry with broccoli and brown rice Carrot sticks and hummus Wednesday Greek yogurt with mixed berries and chia seeds Grilled chicken Caesar salad Baked cod with roasted sweet potatoes Celery sticks and peanut butter Thursday Overnight oats with almond milk and sliced bananas Turkey and vegetable wraps Lentil and quinoa stuffed bell peppers Edamame and mixed nuts Friday Scrambled eggs with avocado and whole-grain toast Grilled chicken and veggie kebabs with brown rice Baked chicken thighs with roasted Brussels sprouts Greek yogurt with berries Saturday Breakfast smoothie with spinach, banana, and almond milk Grilled salmon and quinoa salad Baked sweet potato with black bean chili Apple slices and cottage cheese Sunday Whole-grain pancakes with berries and maple syrup Grilled chicken and veggie wraps Baked turkey meatballs with zucchini noodles Cucumber slices and tzatziki dip This meal plan has lots of tasty, healthy meals. You won’t get bored or feel hungry. It has the right mix of food to keep you full and happy. Weight loss is more than just numbers. It’s about feeling good and making healthy choices. This meal plan helps you do just that, one meal at a time. alt=”meal plan for weight loss female” data-id=”133054304″ /> Essential Kitchen Tools and Ingredients for Your Weight Loss Journey Starting a weight loss journey means having the right kitchen tools and ingredients. I’ve made a detailed guide for you. It includes the must-haves for healthy eating. Must-Have Kitchen Equipment for Meal Prep Good meal prep tools are key to success. Here are some essential items for easy meal prep: High-quality food processor or blender for chopping, mixing, and blending ingredients Sturdy set of measuring cups and spoons for precise portion control Reusable meal prep containers with airtight lids to store your freshly prepared meals Slow cooker or Instant Pot for hands-off cooking of lean proteins and hearty vegetables Baking sheets and parchment paper for roasting vegetables and baking healthy snacks Shopping List for the Week Here’s a suggested shopping list for the week: Protein Carbohydrates Vegetables Healthy Fats Seasonings Chicken breasts Brown rice Broccoli Avocado Garlic Salmon fillets Quinoa Spinach Olive oil Herbs (basil, rosemary) Lean ground turkey Sweet potatoes Bell peppers Nuts (almonds, walnuts) Spices (cumin, paprika) Storage Solutions for Meal Planning Success Keeping meals fresh is key. Here are some storage tips: Glass or BPA-free food containers with airtight lids for refrigerating cooked meals Resealable plastic bags or vacuum sealer for freezing individual portions Lazy Susan or stackable shelves to organise your pantry and fridge Label maker or stickers to clearly identify contents and expiration dates With the right tools, a good shopping list, and storage, you’re set for success. Enjoy a healthy, stress-free life. Breakfast Options That Kickstart Your Metabolism Starting your day with a healthy breakfast is key for losing weight. A balanced breakfast gives your body the nutrients it needs. It also boosts your metabolism, helping you stay active all day. Adding these simple breakfasts to your healthy diet plans can really help with your simple meal plan to lose weight. Overnight Oats: A Fibre-Filled Breakfast Overnight oats are a great choice for a quick, filling breakfast. Mix rolled oats, milk or yoghurt, and your favourite fruits, nuts, and seeds in a jar the night before. In the morning, you’ll have a creamy, nutritious breakfast ready to eat. Avocado Toast with a Poached Egg Avocado toast is a tasty, satisfying breakfast. Start with whole-grain toast, add mashed avocado, and top with a poached egg. The avocado’s healthy fats and the egg’s protein will keep you full and energised. Breakfast Option Calories Protein (g) Carbs (g) Fat (g)

Join the community and get healthy recipes, fitness tips, meal plans and more.

You have been successfully Subscribed! Ops! Something went wrong, please try again.

Recipes

Meal Planning

Fitness

Health & Living

Copyright © 2024 EatFitPlan All Rights Reserved

As a passionate explorer of the intersection between technology, art, and the natural world, I’ve embarked on a journey to unravel the fascinating connections.
You have been successfully Subscribed! Ops! Something went wrong, please try again.

Quick Links

Home

Features

Terms & Conditions

Privacy Policy

Contact

Recent Posts

  • All Posts
  • Drugs & Medications
  • Fitness
  • Health & Living
  • Nutrition
  • Recipes
  • Weight Loss
    •   Back
    • Workouts
    • Beginner
    • Advanced
    • Challenges & Plans
    •   Back
    • Food
    • Meal Planning
    • Meal Type
    • Plant-Based Menus
    • Keto Recipes
    •   Back
    • Healthy Eating
    • Yoga

Contact Us

© 2024 Created with Royal Elementor Addons